Artemis Exercises #3
This third set of exercise will get you logged into the Open OnDemand Web Portal and exploring the Interactive Applications.
Go Back to Splash »Exercises
The biggest game changer when it comes to the Open OnDemand Web portal is the ability for the ITS Platforms - Research Team to add default applications and services such as Jupyter notebooks and Labs, Remote Desktop, Matlab and Rstudio Servers.
These first 4 were the most numerous service requests the team has received in the last 5 years.
We hope to expand these services out as demand and the Research Teams skills develop.
Remote Desktop
This service will replace the extremely old and deprecated Exceed OnDemand client and server. This was primarily used for Graphical rendering and we expect the XFCE Remote Desktop App to be used in a similar way.
We do not envisage Artemis being used as a permanent “Desktop” for users, as we do not have the capacity or the storage to provide that kind of service… yet :D
This service is expected to be used with 3D rendering software used in Chemistry, FSLeyes in Neuro etc. Interactive, 3D GUI.
Its the “Clicky Button” or “Pretty IDE space” for users to use.
If theres is a “Desktop Application” software you’d like as basic - you would request it via the usual Service Request - ITS HELP portal.
Exercises
-
Starting a XFCE Remote Desktop Session
If you aren’t already on it, you’ll need to navigate back to the Dashboard.
Select Interactive Apps -> Desktop -> DEV-Remote Desktop.
You should see a page like this:
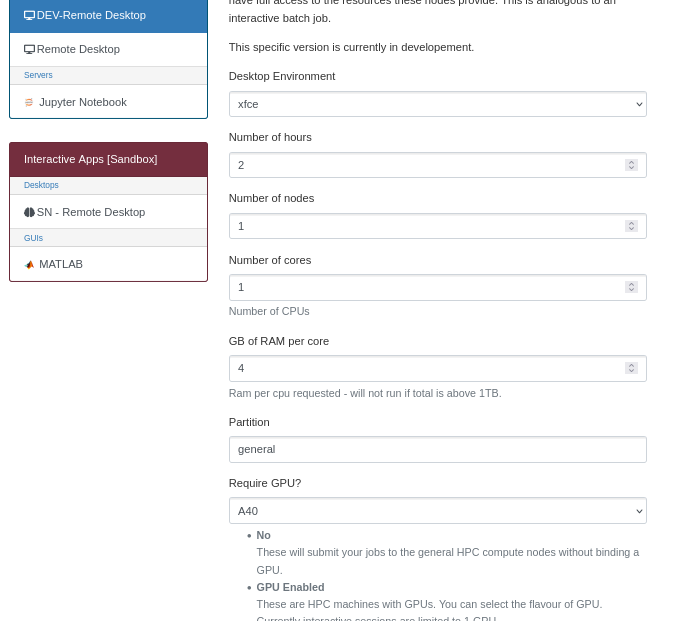
Do not change these options for this exercise. If your default are different, please set them as above. If you say A40 for GPU - please be aware it might take some time to queue - consider turning this to no for now (it wont really be needed, but gives an example of an environment with one)
You can also navigate to this page by clicking the
 Icon -> DEV-Remote Desktop:
Click Launch.
You should now have something that looks like this:
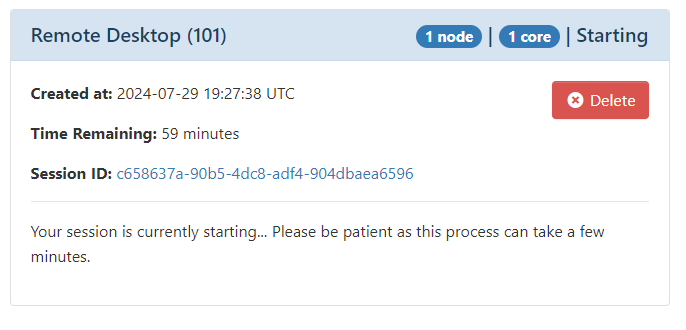
Once this completes and the job starts you should get something like this:
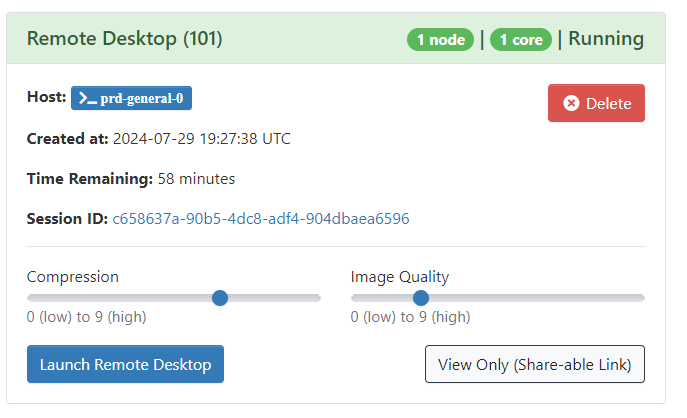
If you’re internet runs at the speed of a sloth in high winds after a night out in Revenge, you can increase the compression and decrease the Image Quality to reduce the network bandwidth and letnecy.
Additionally, if working remotely from your supervisor or colleague, you can share a View Only link that would allow them to see your activity.
Click Launch Remote Desktop.
-
Play Around
You should have a new window or redirect and a loading grey throbber. Do not hit refresh - the token is one-time-use - you’ll have to click Launch again from your Interactive Apps page from the Dashboard.
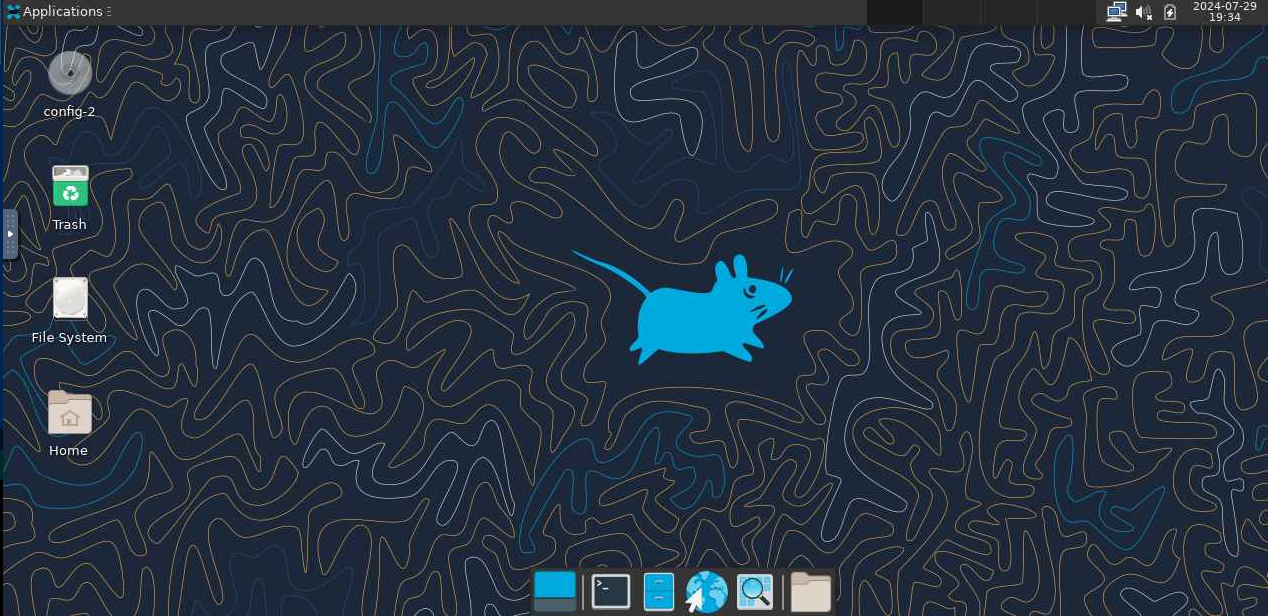
Once the Remote Desktop has loaded you should have something like this (depending on what your conference friends have done to the desktop so far).
Play Around.
No Seriously - Have a play around, explore the space and try to think of whats missing, what you’d like there. Keep some notes and let us know in the feedback form!
Suggestions:
- Filesystem: Navigate, create, copy etc.
- Terminal - Pay attention to where you start (hostname)
- Environment Variables
- Software
- Explore the Settings on the Left-Hand-Side Pop-tab. (Especially how the clipboard works with mac!)
-
Disconnecting or Ending Session
When you want to end your session, but leave the remote-desktop running, simply exit the tab.
You can resume right where you left off by re-launching the connection from your Interactive Applications page.
You can permanently end the session by clicking your Username -> Logout.
This will eventually complete the Remote Desktop Job and should look like:
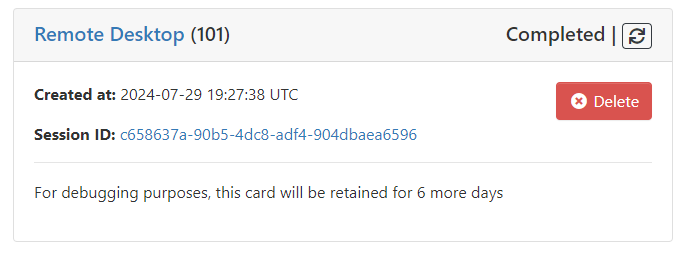
If you want to re-launch it because you closed it by mistake simply click the relaunch button
 .
.If you want to clear the job - click delete - otherwise it will be cleared automatically in 6 days.
-
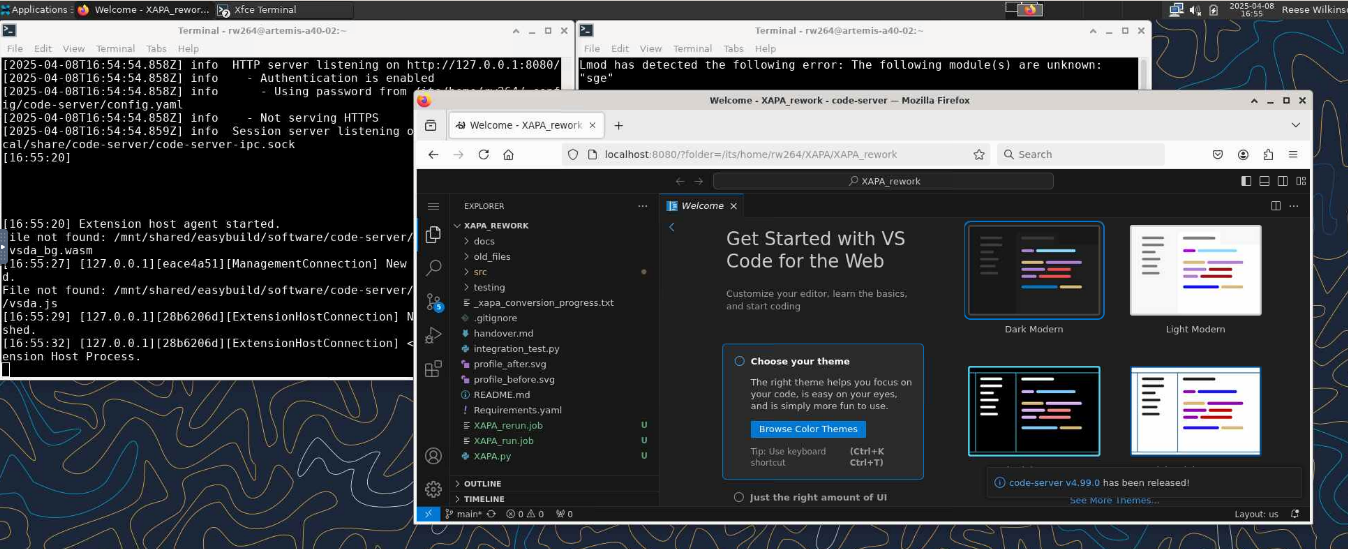
Due to popular demand you can also run VS-Code from here. We do not allow remote execution of VS-code onto the Artemis cluster. This is due to filespace issues and accidental copilot runs…
Start a terminal.
Run
module load code-serverThis is a specifically built clone of VScode that will start a webserver version of it for you on the HPC, in the remote desktop.
Run the code server with the command:
code-server. We suggest you close this down immediately and go and edit your config directory which is has now created for you under: `/its/home//.config/code-server/config.yaml bind-addr: 127.0.0.1:8080 auth: password password: <randomly-generated-password> cert: falseWe would recommend changing the top bind port to something which wont clash with another user. (From the default). And setting the password to something you can remember but which is NOT your ITS password…
Now restart code-server in your shell, and click the browser icon.
Navigate to
localhost:8080and type in your password (note it probably isnt 8080 anymore).Voila. It should look something like:
Jupyter Notebook
If you are not familiar with Python - do not worry - we are just using Jupyter as an example for custom envs which R etc can be used with as well.
If you are not familiar - Jupyter is a development environment with run-time execution via “Cells” (json objects for the front-end devs in the room). They also provide a Markdown syntax and PDF export - making them rather useful for new coders, and report generators.
Starting the Notebook
-
Requesting A Jupyter App Session
I am once again asking you to navigate to the Interactive Apps page.
Click the Servers -> Jupyter Notebook in the left hand pane (lab is an option once the server starts).
You should have something like this:
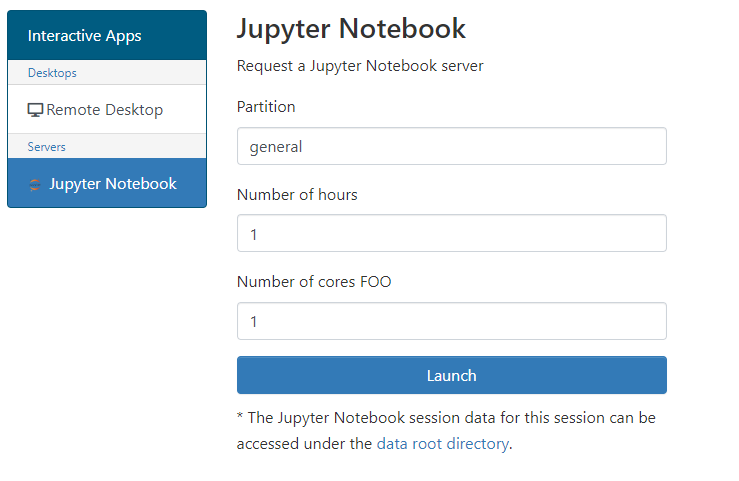
Dont worry about the
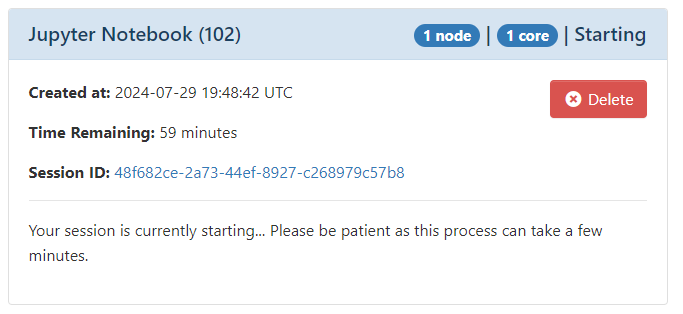
FOO, the Jupyter Service was recently being played with by the coolest research computing team member… 👀For now - don’t change anything and click Launch - you should have the screen show:
Which hopefully looks familiar from the Remote Desktop Launch.
Currently we don’t have naming added to look for specific services so take note of the session ID for your session for now.
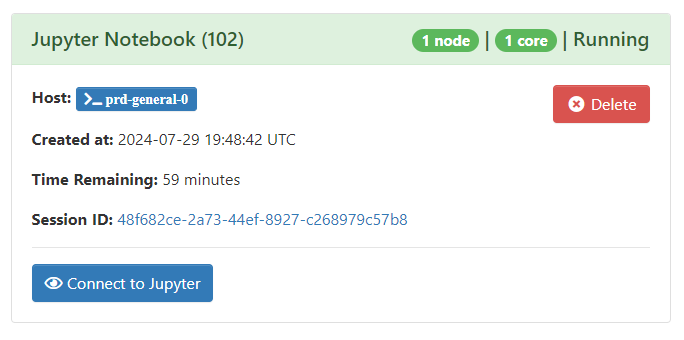
Eventually the screen should look like:
-
Connecting to the Jupyter Notebook
Click the button.
No ssh tunnel
No port forwarding
No hanging ports from before because Macs don’t turn off properly and now its a headache…
Simples.
You should have something that looks like:

-
Create a Notebook
Navigate to your
workdiryou create from Exercise 1.Using New -> New Folder: Create a new folder called
Jupyter.Using New -> Notebook: Start the default Kernel and a Jupyter Notebook and Kernel.
You should now have a Jupyter Notebook running, with the default Ipython Kernel called
Untitled.ipynb.To Rename the notebook file click
Untitledand you’ll have a prompt appear to rename it to something useful. Please do so to avoid conflicts.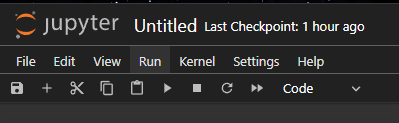
-
Don’t forget that for custom environments pending the App being enhanced, you can use the remote desktop to launch Jupyter Notebooks.
If you already have a python environment setup - log back into your remote desktop and start the jupyter session there.
You can navigate to the jupyter app using the browser like with code-server.
If not - quickly run in a shell, following the prompts:
 module load Anaconda3/2022.10
 module load proxy/public
 conda init
 conda create --name jupyter-env python=3.11 jupyter ipython numpy scipy
 conda activate jupyter-env
 jupyter notebook
Creating A Custom Kernel
One of the important difference between the Artemis HRC Jupyter Notebooks and your laptop is version maintenance. We will be updating the App, packages and libraries.
This WILL break code.
You should always rely on your own environment or a module loaded by the module load command.
| ⚠️ Warning ⚠️ |
|---|
| IMPORTANT: You do not need to do these steps today. Creating a kernel from scratch can take time - and based on bandwidth, might take 20m or more for your own research purposes. This is here to go through the basics of how to create a kernel to use. |
-
Start a Compute Session
Leaving you Jupyter Notebook session running, in another tab navigate to the Dashboard.
Start an interactive session:
- Click Cluster -> prd Shell Access.
srun --pty bash -l
-
Init Conda and Create Env
This is pretty much step by step to create your own Python environment on the HRC. Again - You dont have to actually run this.
module load Anaconda3/2022.10conda initmodule load proxy/publicconda create -y --name Py3.10-Python numpy scipy jupyter ipythonconda activate Py3.10-Python
-
Install Kernel
This is the magic which will make your user environment available to the Jupyter App. AGAIN dont actually run this.
python -m ipykernel install --user --name Py3.10-Python --display-name "Python (Py3.10)"
-
Clean Up
Exit the Interactive Session and Close the Tab
We want to free up the resources for other users now.
Connecting to your Kernel
There is now a kernel which you can pip install python packages to.
-
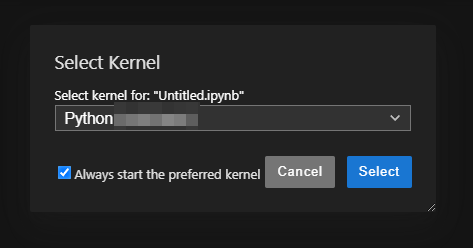
Connect the Kernel
In your Jupyter Session - click the Kernel button in the top right.
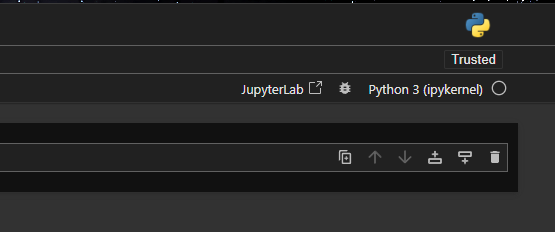
This will give you a new drop down - where you should see the another kernel besides the default.
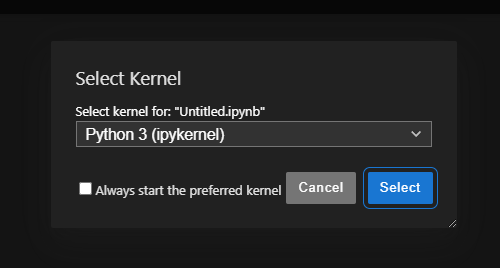
If you select the checkbox - the next time you start Jupyter this kernel will be loaded by default:
Stopping
Simply Exiting your Notebook will not stop the session or Kernel.
Or if you have started multiple notebook - you might need to clean up your environment.
-
Stoping Running Kernels
In the Jupyter Home File Browser Tab:
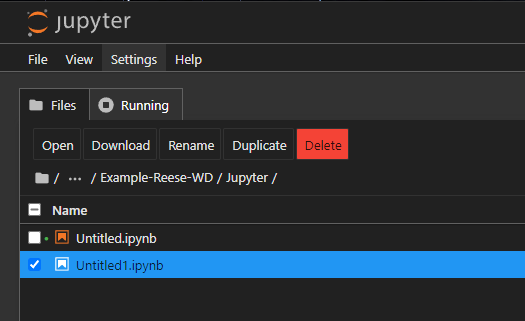
Click the
RunningTab - And you can individually or group Kill running kernels. -
Ending your session
Simply Exit all your Jupyter Tabs.
The Interactive Applications page from the Dashboard will show your Jupyter Notebook Job as completed. Once again you can simply hit the relaunch
Icon to start a new session.Deleting the Session will not delete your files. And the job session will be deleted in 6 days automatically.
Extension Exercises
These exercise are designed to push your current understanding of the Artemis HRC and the Open OnDemand Web Portal.
You’ll need to think about what resources you request when submitting these jobs. Particularly what happens with and without enough of a specific resource.
-
GPU
Run an interactive session and attach a single gpu. The Apollo2 to Artemis docs page will aid with this - but you might need to make use of the slurm commands to search the config to do this.
Task:
Python GPUDescription: Starting a GPU session, build a new Anaconda Environment with Tensorflow GPU support. Run the Test suite for Tensorflow.
Task:
MixbenchDescription: Clone “https://github.com/ekondis/mixbench” and compile, build and test the sessions GPU and CPU.
Summary
You should now have a good understanding of launching two interactive application from the Open OnDemand Interactive Applications Service.
You should also feel comfortable:
- Creating Environments:
- Understanding you’ll need to load modules or personal environments when using the HRC
- Creating XFCE Desktop Sessions
- Navigating the Remote Desktop - Including Remote Mounts
- Terminating Sessions
- Starting Jupyter Notebooks and Lab servers.
- Creating Kernels to be used by the Applications Launched from the Portal
- Clearing up resources when not in use to apply fair use.
- Navigating and Creating Files within the Jupyter File Explorer.
- Changing, Starting, Stopping Kernels.
| 🎉 🎉 🎉 Congratualtions 🎉 🎉 🎉 |
|---|
| This is the End of the Workshop. However the Workshops Repo will be updated continually and you may find new tutorials. There will be more session run on Artemis and the HRC in the coming months. Check the Slack #hpc-workshop channel for details. |